Analytics Demystified - Part 4: Scheduled Reports
Thursday, June 26, 2008 | 9:29 AM
Labels: Google Grants Blog, Tracking Performance
With Google Analytics you can customize and view reports about your account. You can pull these reports manually or have them e-mailed to you at intervals you specify.
If you've been following this series and seen how Google Analytics can help you gauge your website's performance, you may be wondering how to organize all the information you get.
Scheduling reports allows you to receive regular updates on the data that matters most to your organization. If you'd like a step-by-step guide on hand for the setup process, feel free to download a copy of our Google Grants Scheduled Report Guide for reference. This guide also helps you set up scheduled reports to answer the specific questions in your quarterly analytics survey, if you are required to do so as a participant in our Additional Services program.
Scheduling a report
To view a report, login to Analytics and choose data to view from the choices on the toolbar. You can customize the date range for the data by clicking on the date in the top-right corner of your view and choosing dates from the drop-down box.
Once you've specified dates for your data, click the "Email" button above the data to have that report emailed to you as a PDF, CSV (for Excel), XML or TSV file.
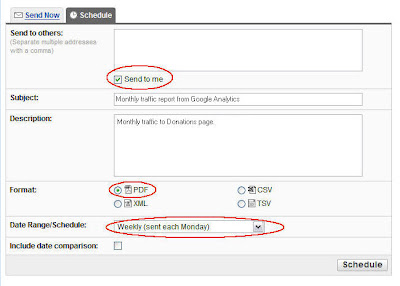
From this screen, you can set scheduled reports to be sent to you on a daily, weekly, monthly or quarterly basis by choosing the "Schedule" tab.
To schedule reports:
- From the Schedule tab in the Set Up Email screen, enter the email addresses that should receive this report. Check the box next to "Send to me" if you'd like the report sent to the email address on the account.
- In the Subject field, enter a subject that will get your attention when it arrives in your Inbox, such as "Monthly traffic report from Google Analytics."
- In the Description field, describe the report's content for easy reference—for example, "Monthly traffic to Donations page."
- Choose the file format that works best for you. A PDF looks like the report screen in Google Analytics; a CSV is a spreadsheet you can manipulate.
- Choose the schedule on which you'd like your reports: daily, weekly, monthly, or quarterly.
- Check the box next to "Include date comparison" if you'd like to see this month's data compared to another month's.

You can then add additional reports by choosing the "Add to Existing" tab the next time you choose to e-mail a report.

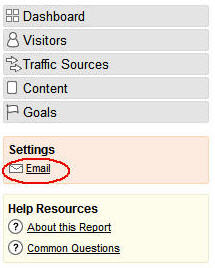
If you want to change your scheduled reports later, just click Email from the Settings menu on the left navigation bar and change, add or delete reports.

That's all for our series about Google Analytics for now. If there are other components of Analytics you'd like to have us explain in more detail on the blog, let us know what you'd be interested in and we'll put together a walk-through for all the Google Grants Analytics users to read right here on the blog. We're excited to see the use of Google Analytics data grow among non-profits and Google Grant recipients. To learn more about the program's benefits:
- discuss it with your peers in the Google Grants Help Group
- review the Scheduled Reports and Analytics guides
- visit the Analytics Help Center
- subscribe to the Google Analytics Blog
